How to tune your violin
Method 1: Tune Each String Independently (beginners)
- Click the button for the string you want to tune. If the tuning tone is too loud, you can adjust the volume with the slider (the webpage will remember the volume next time you visit).
-
While the tuning tone is playing, pluck the corresponding string you want to tune. If the sound from the
string is not close in pitch to the tuning tone, use the peg tuners to adjust the tension in the string.
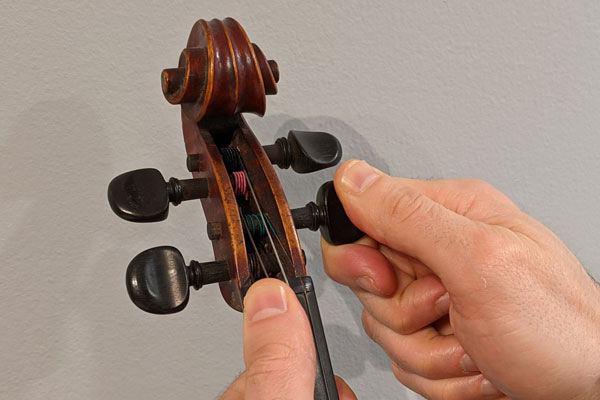
Turn the peg clockwise to raise the pitch and and
counterclockwise to lower it. Continue plucking as you turn the peg. Go slowly as it's easy to over tighten.
-
Continue adjusting the peg until the string’s tone is very close to the tuning
tone.
-
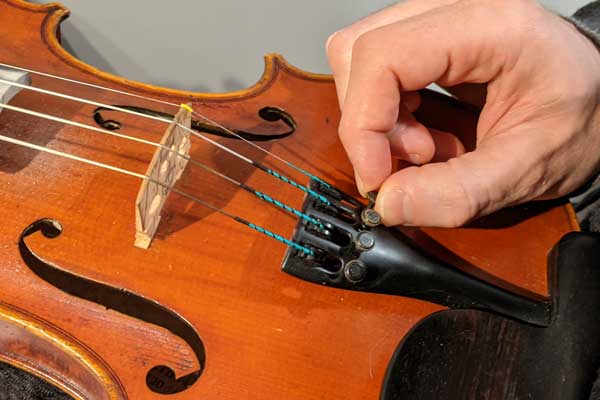
If your violin has fine tuners, adjust the string’s fine tuner until it exactly matches the tuning tone,
otherwise, use the peg to match the tuning tone.
-
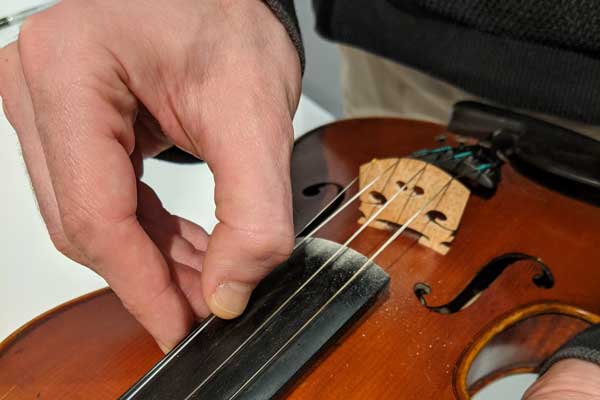
If the string is slightly sharp (slightly high in pitch), you can pull at the string to lower the pitch. Be
careful here too, it is possible to break a string if you pull too hard.
The steps above can be done with the bow as well. If attempting to tune using a bow:
- Hold the violin using the chin rest and your shoulder rest. If you don’t have a shoulder rest, just use a sponge or folded cloth. Watch this video for instruction.
-
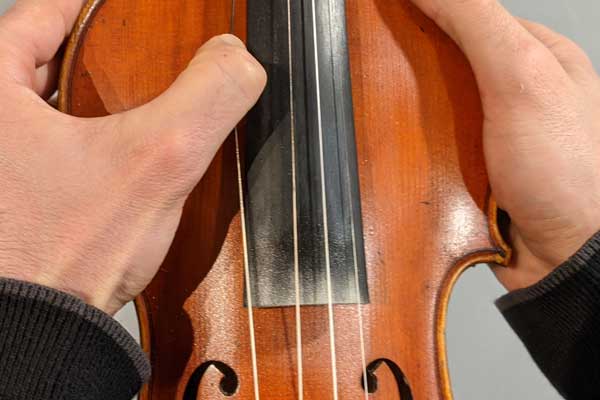
Place the bow on the strings and wrap your left arm around the violin to access the fine tuners as shown in
the image.
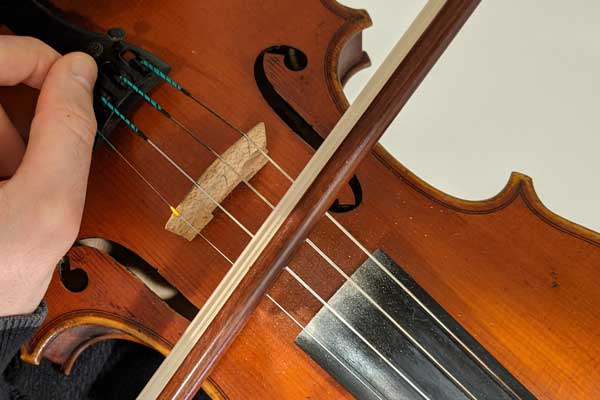
- Pull the bow slowly across the string you want to tune. Follow the "Tune Each String Independently (beginners)" set of steps above for each string with this adjusted method.
Method 2: Tune Using only A-string and double stops (expert method)
- Tune only the A string using the beginner method or the bow.
- Now pull the bow across the A and D strings simultaneously.
- Adjust the D string fine tuner (or peg) until the two strings played together produce a perfect 5th.
- Now pull the bow across the A and E strings simultaneously.
- Adjust the E string fine tuner until the two strings produce a perfect 5th.
- Now pull the bow across the D and G strings together.
- Adjust the G string fine tuner (or peg) until the two strings produce a perfect 5th.
Violin Tuning FAQ
How do I replace the strings on my violin?
Replace one string at a time. Loosen the old string’s peg and gently unwrap the string from around the peg. Once completely unwrapped, remove the string. If you do not have fine tuners, insert the end of the string with the cylinder into the corresponding hole in the tail piece of the violin, otherwise, insert the cylinder into the slot in the fine tuner. Insert the free end (the end without the metal cylinder) of the new string into the tiny hole in the peg and begin wrapping the string around the peg by turning the peg until the string is taught.
What are fine tuners?
Fine tuners are screws that when tightened, push down on a small portion of a string to increase its tension. Fine tuners are extremely useful for precision tuning and recommended especially for the E-string and A-string.
What should I do if I can’t move my pegs?
A violin’s pegs are tapered, therefore, if the pegs are pushed inwards, the friction holding them in place will increase. To temporarily turn the peg, you can pull the peg out slightly and turn, however, if the peg is too rough, it will be difficult to fine tune. A more permanent solution is to remove the peg completely (which involves removing the string) and polish it with graphite (pencil lead). The graphite acts as a lubricant and will allow you to turn the peg with ease.
My fine tuners are tightened all the way, how do I raise the pitch?
Use the pegs to tighten the string slightly and then loosen the fine tuner to about half its screw height, then use the peg to tune the string as closely to the tuning tone as possible. This procedure will provide leeway for both sharpening and flattening the string’s tone via the fine tuner.
Where can I purchase strings?
Strings may be purchased online at a variety of places including Shar Music, Southwest Strings, and Amazon. However, the majority of music shops, and every storefront that sells violins will also offer strings.
What are the strings on my violin?
Facing the front of a violin with the scroll pointing up, the strings from left to right are G, D, A, E. They are tuned in fifths, relative each other. G is the lowest pitched string. E is the highest pitched string. Concert C is found between the A and E pitches of the violin.
How do I learn to tune my violin?
You’ve come to the right place! You can follow either of the tuning methods above. The best way to learn to tune a violin is to find an experienced player and have them physically show you. YouTube videos are the next best thing.
My E-string keeps breaking, what am I doing wrong?
The E-string is the thinnest and also the most taught string on the violin. It is sensitive to overtightening, especially when it is new. When tuning an E-string, be very careful not to overtighten the peg. Tighten the peg in small increments and test whether the tone is close to the tuning tone. Once the E-string is close to the tuning tone, use its fine tuner to finish the job.
Does it matter which string I tune first?
If tuning by 5ths using the double stop method, tune the A-string first. The A string is the basis for the rest of the instrument. Otherwise, if using the beginner method of matching strings to each of the tones G, D, A, E, it does not matter which string is tuned first, though we recommend you start with the G string and move to the right.
Is it bad for the bridge when only three strings are attached?
It depends. The violin or bridge should not experience damage if only three strings are attached for a short period of time. However, if you plan on storing the violin with only three strings attached, loosen the strings to minimize the imbalance of force on the bridge. Be aware that the tension of the strings creates a downward force on the bridge which is counteracted by the sound post inside the violin. If the strings are loosened enough, it is more likely the sound post will fall over. Keep some tension on the strings to avoid this.